Pages


Monday, February 27, 2012

Oreo Mini Pies!

If you all LOVE oreos as much as I do, then you'll love this super fast recipe!

Oreo Mini Pies 

Ingredients
2 refrigerated pie crusts (I got mine from Walmart for $2.43 total!)
24 Oreo cookies (I used the white Oreos with chocolate frosting)
Peanut butter ( You could substitute peanut butter for NUTELLA!)
Butter
Sugar

First, preheat your oven to 350 degrees F. Then spray cooking oil into your muffin tins.

Unroll your pie crust and start cutting out 12 circles. I used the top of my peanut butter lid as a cutter! 

Now you can place the circles into your muffin tins. Keep in mind your lid may not be the same size as mine! 

You can now spread peanut butter over each cookie and stack 2 cookies on top of each other, after that, place each cookie tower into one of the muffin tins!

The hardest part is cutting out slender pieces of pie crust to make a "lattice" effect for the pie crust. I got bored half way through and started making my own designs! 

Finally brush each pie with some melted butter and then sprinkle some granulated sugar on top.

These pies should cook in the oven for about 20 minutes or until a nice golden brown color!

Thursday, February 9, 2012

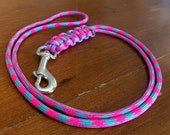
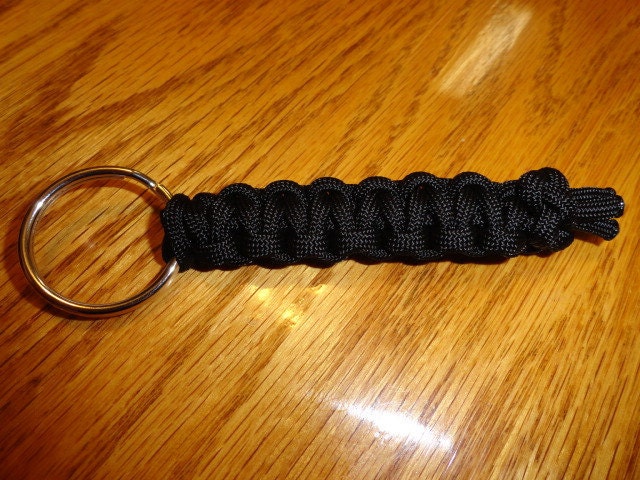
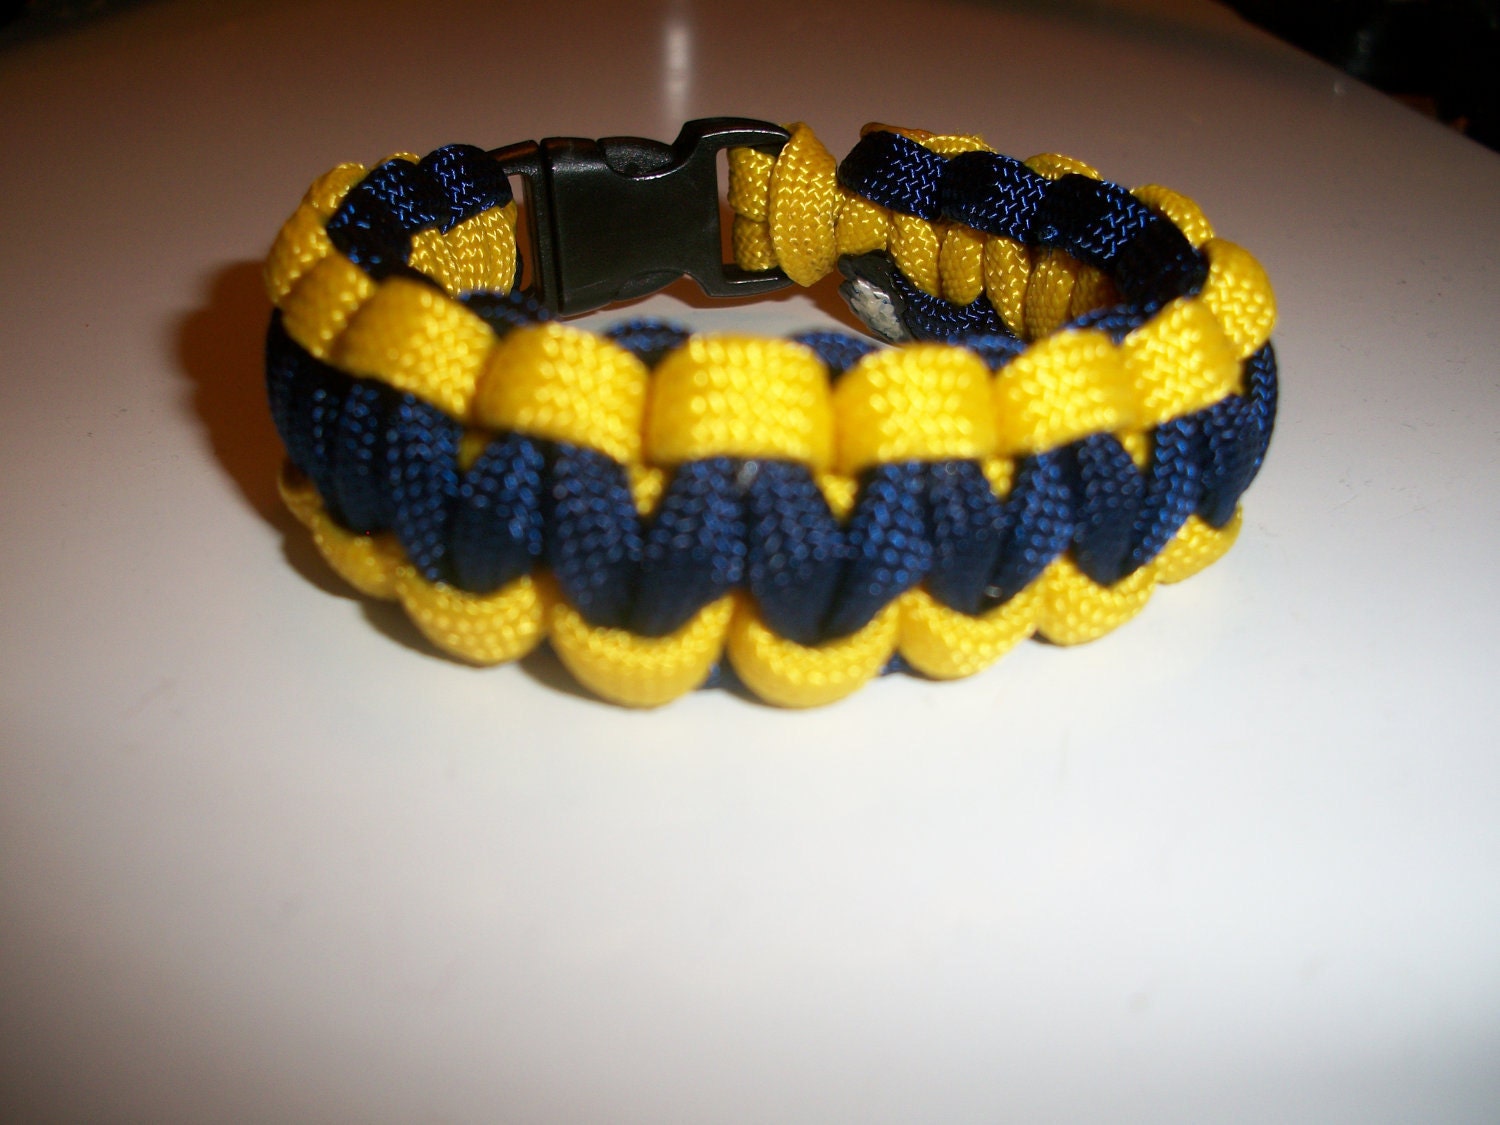
Paracord Creations!

We don't have this color in stock,
however if you are interested let me
know and I will order some!!!
Hello! Welcome back. Today's post is going to be a little different than normal. I want to talk about my paracord bracelets, dog collars, lanyards, and key chains!

Josh and I have recently started making things from paracord and want to share them with you!'

Currently the bracelets are $6 a piece or 4 bracelets for $20!  (come with a 3/8 buckle unless stated otherwise)
Dog Collars are $13 (come with a 5/8 buckle)

Lanyards are $8
Keychains are $2

Each item can contain up to 2 colors!

The colors we have in stock are:
Black
Navy
Yellow
Neon Yellow
Green
Red
Silver
White


We are able to get just about every color under the sun, so if you would like to purchase an item, but we don't have a color you want let us know! We can make special arrangements to order that color! No extra fee!

If you are interested in purchasing you can email me at courtneynicoleu@ymail.com or contact my through my facebook.

Also if you aren't from the area or would like to send these as a gift, we do have an etsy account where you can purchase using paypal and we will ship the item out to you!
 Click here to visit our Etsy SHOP!


Wednesday, February 8, 2012

Easy HomeMade Valentines Gift


If you guys are anything like myself, I LOVE making homemade valentine's gift for my special someone. I think they mean so much more, and I really enjoy it.

So today, I'm showing you a super easy, and VERY cheap, way to make your valentine's heart melt.

52 Reasons I Love You.

You'll Need:
A deck of cards
scissors
ribbon
hole punch
Permanent marker

I started out by writing one reason I love Josh on each individual card. Sometimes I had to write on the back of the card, other times I wrote on the front it doesn't matter, get creative. After I had written all 52 reasons why I love him, I started hole punching the cards, in the top left hand corner.

Finally I put a cute little ribbon through the holes in the cards to attach them all together. You can use a ring if you want either way, as long as they stay together it doesn't matter.


This is such a simple and thoughtful gift for your honey! I can't wait to give mine away!

Monday, February 6, 2012

Sandpaper Iron ON!

Every wanted to make your own iron on but not have the supplies to do it? WELL, you are in luck! You can use these simple household items to transfer an image onto a cloth surface.

Supplies you'll need:

  1. Sandpaper
  2. Crayons
  3. Parchment Paper
  4. T-shirt or item to transfer onto
Color an image onto your sandpaper, keeping in mind the image will be reversed.
Once you have your design the way you like, add an extra layer of crayon, so it's nice and thick. We want to make sure the wax really sticks to the surface.


Place a piece of cardboard inside your item, so the design doesn't transfer onto the other side. Position your sandpaper the way you like. Place a piece of parchment paper or a power towel between the sandpaper and your iron, to protect the surface of your iron.


Place your iron onto the item and leave for around 30 seconds. Lift up the side of the sandpaper to see if your image has started to transfer. Iron a bit more if you don't think it's transferred enough. 


To set the color onto your item place in your dryer for around 20 minutes. Make sure you wash by itself the first time.


*Keep in mind, because you are coloring on sandpaper, there will be some texture when applying your image to the shirt!

*Also keep in mind, i'm no artist! This was just something I came up with quickly.

Tuesday, December 20, 2011

Microwave Cake Pops

How many of you have seen magazines and even cook books that are featuring CAKE POPS? How many of you thought, that is way to much work for me? Well, I've got a tip that will cut down nearly half of the time it takes to cook and prepare these new sensations. MICROWAVE the cake itself. Yes, its true. You can microwave a box of cake mix. Instead of taking around 40 minutes in the oven, you can cook a cake in the microwave for about 10 minutes!
What you'll need to make your cake pops:
Cake Mix
Frosting
Lollipop Sticks
Cake pop stand or Styrofoam
Melting Chocolate ( I bought red and green for the Holidays!)
Sprinkles (Optional)


Directions
Start out by following the directions on the back of the cake mix box. Make sure you grease your glass dish, and pour your cake batter into that. Place in the microwave and set the timer for 10 minutes. All microwaves are different and you may have to cook your cake for a longer or shorter amount of time. Make sure the majority of the cake has rose. If the center is still somewhat liquid, or giggly as I like to say, that's okay! Leave the cake set on your counter for 10 minutes, this will allow the cooking process to finish. After 10 minutes ensure the cake is now finished. If not put back into the microwave until it is done. You can now allow the cake to cool.
Ignore the mess in my microwave ;)

Cake after taking it out of the microwave
After the cake is cool, you want to get a large mixing bowl and transferring the cake to the bowl. Obviously, it doesn't matter if you have to take the cake out in pieces, as we are going to mix it up anyways. I find it easiest to mix the cake with a mixer to get the cake into tiny crumbs. But whatever is easiest for you, is just fine.

Cake crumbs!
When the entire cake is now into tiny crumbs, you can start adding your frosting. You'll most likely need around 1/2 to 2/3 of the frosting, but add it in small parts. You can simply use your hands and just mix the frosting with all of the cake crumbs. Ultimately you want to frosting to act as a cement, so that when you roll the balls up they stick and stay put. If that doesn't happen, and your cake balls start to crumble, simply add more frosting. You'll find the perfect amount for your cake mixture, everyone will be different.


What your mixture should look like after adding frosting
When your cake crumbs don't need anymore frosting, you can start rolling them up into small balls and putting them on a cookie sheet. I got 36 cake balls out of my cake mix. Once you are all finished rolling up your balls. Place your cookie sheet in the refrigerator for 1 hour, so they can harden up. 
Rolled up cake balls

After impatiently waiting that long 1 hour, take your balls out of the refrigerator! You can start melting the chocolate in 30 second intervals, until it is completely melted. Dip the end of your lollipop stick in chocolate and then put the stick into your cake balls. Making sure to do one ball at a time, so the chocolate is still sticky when placing your lollipop stick in the cake balls. Yet again, put your cake balls back in the refrigerator to harden up.

After waiting around 15-30 minutes, take your balls out of the refrigerator. You'll most likely have to remelt your chocolate again. Now you can start dipping the entire cake ball into your melted chocolate! If you chose to buy sprinkles, immediately dip your chocolate covered cake ball into a bowl of sprinkles. Now is where the Styrofoam comes in handy. Place the lollipop stick into the Styrofoam so the chocolate will not smear if you were to lay it down. I used a cake pop stand I bought at WalMart, but either one will work just fine.Repeat for all of your cake balls!


Obviously you can create different styles and designs for the Holidays, add some pretzels to the top and your cake pop could be a reindeer! Hope you enjoyed this recipe. Let me know if you decide to try this for yourselves and how it worked out for you! Happy Holidays!!

Sunday, December 18, 2011

Nailpolish Christmas Bulbs

If you guys are anything like me, then you'll love this super EASY way to make your own Christmas bulbs. It's a fun way to get the kids involved too! I got this idea from SayAnythingBrooke from Youtube!


All you need is:
You can find these bulbs at most craft stores!

  • Clear Bulbs (Glass or Plastic)
  • Nail polish
  • Paper towels
  • Ribbon (optional)


First make sure you are in a well ventilated room, because the nail polish will start to get stinky!


Next, put a few layers of paper towels down on the flat surface you will be working on. Just in case you have a few spills.


Get your bulbs out, and take the top off of them, making sure to put it aside because you will need to recap it later! Also keep the container the bulbs came in so we can use this to store our bulbs while they are drying.


Now, pick out some of your nail polishes, preferably the cheaper ones because you will be using about half of the bottle for these bulbs.  Also, you want to pick different colors or ones that have glitter so your bulbs will stand out.


Now, all you've got to do is pour the nail polish inside the bulb. 
Start out with a generous amount, and just keep turning the bulb until the polish starts to get tacky and stops moving. (This does take patience, as this can take several minutes to completely coat the inside of the bulb). Now when you have covered the entire inside of the bulb, you can add a different color or you can stop there!


All you've got to do is put the bulb, top first back into the container they came in. This way all the excess polish will drain out. (Make sure to leave the tops of the bulbs off overnight)


Leave the bulbs overnight!


*Notice how the bulbs are upside down so the polish can drain out
Now this last step is optional. I added some ribbon to my bulbs. Simply cut off some of your ribbon, and make a bow around the top. Make sure to put the top back on, and now you can hang it from your tree!!!


These make great gifts for someone who is hard to     buy for and has everything. Also a great gift for those nail polish lovers, put their favorite nail polish in the bulb and they can enjoy it hanging on their tree!!


Thanks so much for reading, make sure to comment and let me know how this worked out for you!!


Thursday, December 8, 2011

Chalkboard Cabinets

So I saw this picture of a kitchen cabinet with chalkboard paint on the inside, and OF COURSE, I had to try it out for myself. Luckily I had the chalkboard paint already. So it was basically a nobrainer! I asked Josh what he thought about me putting chalkboard paint on the inside of our cabinets, and being the lovely man he is, said "I figured you'd eventually do something like that!" He knows me so well!


You'll Need.


  1. Chalkboard Paint (You can get this at Walmart or any craft store)
  2. A paint brush of some sort
  3. Painters Tape (I'm so impatient and couldn't wait to go to the store to buy painters tape, so I used duck tape. Which worked out really well in the end.)
  4. Sandpaper (optional)
So if the cabinet you plan on adding the paint to has a finish on it, you may want to sand it a tiny bit so the paint will stick. I was too afraid of ruining the cabinets, if the paint didn't come out right, so I DIDN'T sand it. It's all up to you.


Next take your painters tape, or whatever tape you've got, and tape off the section you want to paint. I started small so if it was awful I didn't have to big of a mess to clean up.


Now just start putting the paint on. My cabinets are white and glossy, so I probably had to put 5 coats of paint on to get it the way I really liked it. The instructions on the paint say to wait 1 hour in between layers, I just wanted until it was dry. 15 minutes or so!


It's so simple! When the paint is dry and you think you have enough layers of paint on, go ahead and take your tape off, be gentle!
That's IT. It's such an easy project and it turns out great!

                                                        The finished product!!!!!